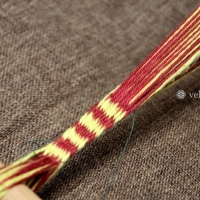
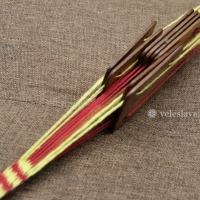
The technique of tablet weaving, which is called double face or double faced, is really double sided. In other techniques, with few exceptions, the face and reverse can be clearly identified. With this technique, you usually can’t tell. Two colours are used for the pattern, which will simply be swapped on the other side, but otherwise the motif will be exactly the same, only mirrored.
Double face tablet weaving and me
I got into double face weaving soon after I understood how to turn the cards in the first place. The reason was simple – I wanted to decorate a ceremonial tunic with a belt featuring branching swastikas (known mainly from the Baltics, but not only from there). Back then in 2012, only some easy ready-made patterns could be found, and I still lacked a few years of practice to draw my own pattern for the regular technique. However, I discovered the magic of the double face technique, with which I could easily and quickly create my motif.

I don’t remember how I discovered double face, but I remember vividly that I taught it to a tablet weaver in Slovakia a few months later, while waiting for the next programme of the Noc Besov festival. 🙂 It was only many years later, however, that I understood that one can weave much more interesting patterns – silhouettes and complex motifs. About that in the next article, let’s get into the beginner’s pattern.
Double face tablet weaving for beginners
Patterns can be created not only on diagonals
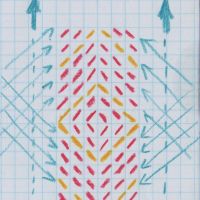
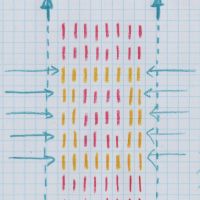
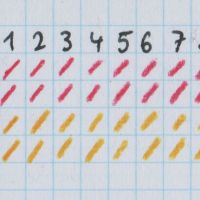
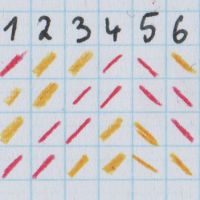
Double-sidedness is not the only advantage of this technique. In normal weaving you usually create the pattern on diagonals, here you have the possibility to create lines perpendicular to the direction of weaving. To make it clear I attach some pictures.
And that brings me to the making of the patterns themselves. All you need is:
- a little fantasy,
- a little patience,
- writing utensils of two colors,
- plain square paper.
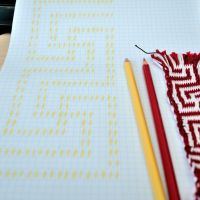
Plain square paper is enough to draw the pattern.
- Take a piece of square paper.
- One colored line in the resulting belt equals two squares in height because you always take two steps. One line in width is equal to one square. If you choose only one square in height, don’t be surprised by the stretched result. 🙂
- You can draw any picture you like in such a square grid, for a start you can try short words, numbers, simple shapes etc.
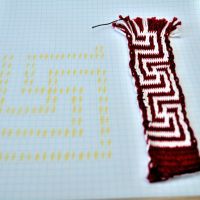
This is a pattern inspired by motifs from ancient Greece and a belt woven according to it.
Does it depend on the direction of the thread? Yes and no
For basic weaving, you solve the direction of the warp threads (usually marked as S/Z in the instructions). If you thread the threads incorrectly, the resulting pattern will not come out correctly. It is different for double face. For a pattern similar to the one above, I like to say that the direction of the threads doesn’t matter.The pattern will look well from a distance in any case. You can have all threads as S as well as Z. It is also possible to alternate S/Z/S/Z/S/Z.
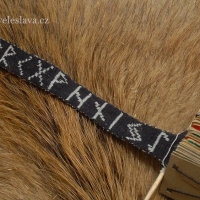
And what will be the difference between stringing one direction and alternating? You can see it in the Greek motif and the first photo in this post. The Greek motif is threaded in one direction, the belt with the different symbols is threaded alternately. For your own motif, choose whichever one you like more.
And when does the direction of threading matter? When you’re creating complex and complicated patterns, which I’ll get to in the next article.
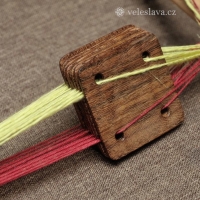
As for the positions of the colours in the card holes, the double face weaving technique is also simple. Two threads of the same colour are always next to each other and all the cards are threaded in the same way. This means, for example, in all holes marked as A and B you will have red and in all holes marked as C and D you will have white.
What is the weaving sequence?
You’ve got the pattern, the cards are threaded, what’s next? Start weaving. 🙂
How do I recognize that I have the cards in the correct basic position?
- Simply.When you look at the cards from the side, there must be two of the same colour on the left and two on the right, so the bottom and top of the warp will contain both colours.
- If you have the cards turned so that the upper part of the warp threads is in one colour and the lower is in another colour, you are in an intermediate step, i.e. in the middle of one row of the pattern. In other words – you have just woven one square in the pattern out of two.
- If you have the cards in the base position, try to weave a piece. The turn/weft/turn/weft procedure is the same as in classic card weaving.
- If you have threaded it correctly and only rotate the cards forward, you will get regular alternating coloured straight lines perpendicular to the warp.
How do I know the line is done? Do the cards have to be turned twice? Do I thread the weft twice?
- I mentioned above that one line of the pattern for double face weaving represents two steps in the actual weaving, i.e. the first turn and weft-through and the second turn and weft-through.
- The completed row will be recognized by the cards being in their basic position again, i.e. the same coloured threads will be on top of each other. However, note that their positions alternate. So after each completed row, you will have the first colour closer to you, the second colour further apart, the next step you will have the first colour closer to you again, and so on.
How do I know which way to turn the cards to continue in one colour or another? How do I not get lost in it?
- If you are starting with a pattern, I recommend separating those cards that you will be turning away from you (away from the pattern) and those that you will be turning towards you (towards the pattern).
- This is not necessary for a belt made by a few cards, but nice patterns are usually made with this technique with 20 cards upwards and you will find it useful there. 🙂 Plus, if you have to stop weaving in between steps, when you return to weaving, you’ll know right away where to turn which cards.
And how do you know where to turn when you are in base position (after completing one line)?
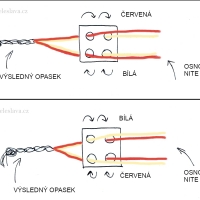
- When the colour you need is near the pattern, turn the cards (twice) away from the pattern (if you have the pattern closer to you, then away from you, i.e. towards the front).
- When the colour you need is near the warp threads, i.e. further away from the finished belt, turn the cards (twice) towards the pattern (if you have the pattern closer to you, towards you, i.e. backwards).
- The picture will hopefully make this clearer. 🙂
And at the end I add some of my older belts woven with this technique (you can find them also in the gallery).
In the next article I will go on to talk about a more advanced version of this technique, as well as a tutorial on how to create animal silhouettes and other more complex motifs.
Do you know the double face tablet weaving technique?
Did you learn what you needed to know in my instructions?
